Data Entry Page in OAF
In this lesson we are going to see how to add data into the Data Base tables.
The following are the steps to follow:
- Create the WorkSpace and Project.
- Create the AM.
- Create the page and attach AM to page.
After creating the above three steps now let us create one sample table to enter the data.
[sql]CREATE TABLE xx_newton_employee (empno NUMBER(7),
ename VARCHAR2(30),
salary NUMBER(10),
doj DATE,
address VARCHAR2(20),
–WHO COLUMNS
last_update_date DATE NOT NULL,
last_updated_by NUMBER NOT NULL,
creation_date DATE NOT NULL,
created_by NUMBER NOT NULL,
last_update_login NUMBER);[/sql]
Now after creating table we need to enter the data into the table for that we know for any kind of DML operations we need to go for Entity Object in OAF, so now let us create EO on the created table. The following process shows how to create a EO in OAF.
In this lesson we are going to see how to add data into the Data Base tables.
The following are the steps to follow:
- Create the WorkSpace and Project.
- Create the AM.
- Create the page and attach AM to page.
After creating the above three steps now let us create one sample table to enter the data.
[sql]CREATE TABLE xx_newton_employee (empno NUMBER(7),
ename VARCHAR2(30),
salary NUMBER(10),
doj DATE,
address VARCHAR2(20),
–WHO COLUMNS
last_update_date DATE NOT NULL,
last_updated_by NUMBER NOT NULL,
creation_date DATE NOT NULL,
created_by NUMBER NOT NULL,
last_update_login NUMBER);[/sql]
Now after creating table we need to enter the data into the table for that we know for any kind of DML operations we need to go for Entity Object in OAF, so now let us create EO on the created table. The following process shows how to create a EO in OAF.
Creating EO:
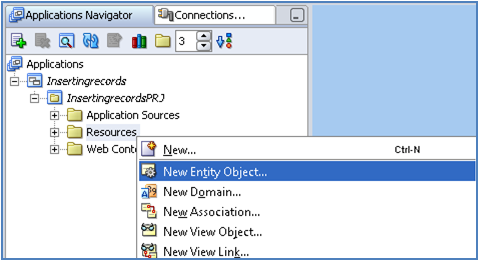
Right click on the folder Resources which is under the Project in Application Navigator and then select New Entity Object… as shown in the below figure:
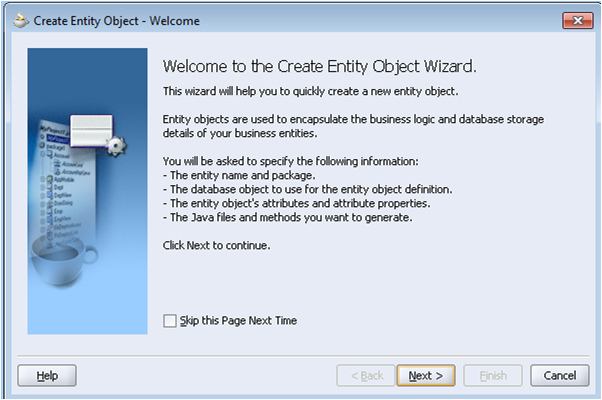
The below figure shows the welcome screen which we will see whenever we click on New Entity Object:
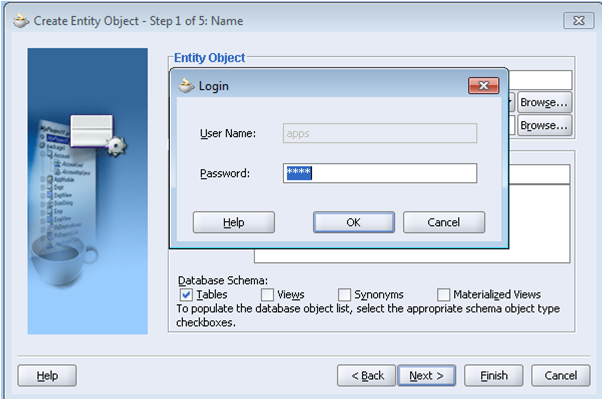
Click on Next Button, whenever we click on next button it shows user name in hide mode and password, no need to do any changes here because generally we will set project properties, click on ok.
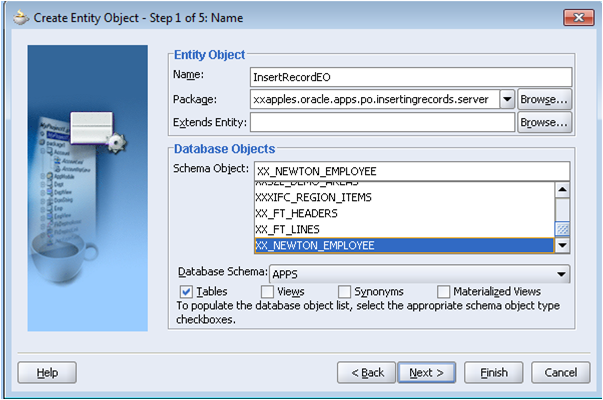
Click on OK button and then in Entity Object give Name for EO and select the proper Package name, in the Database Objects select the proper table name:
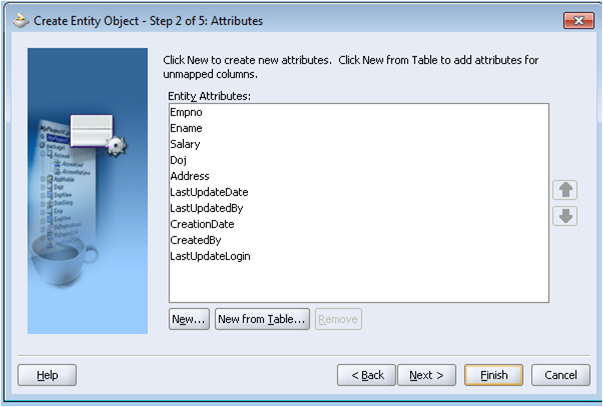
Click on Next button so that we can see the attributes available in the Table (attributes are nothing but the column names of a table which we selected, here all the columns will be converted into attributes).
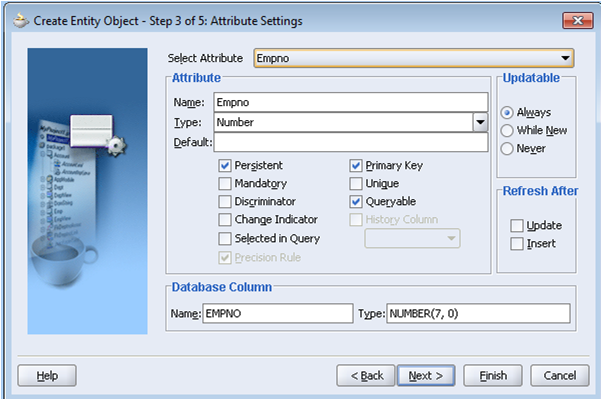
Click on Next button where in that window we can set all the attributes and in that select the primary key value if we are not selecting any attribute as primary key the by default it considers ROWID as Primary Key.
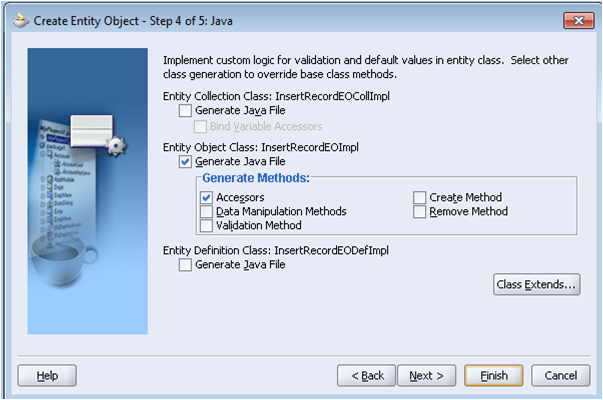
Click on Next button and in step4 no need to do any changes:
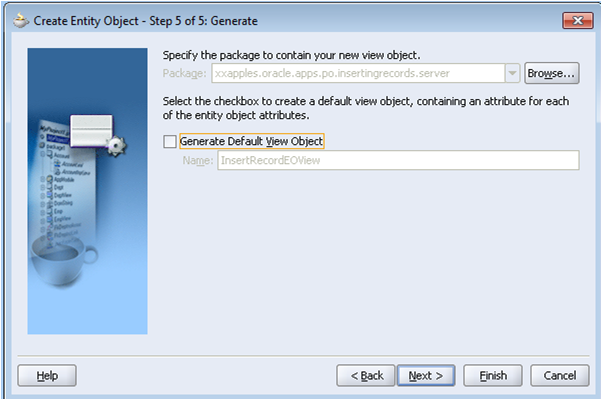
No need to do any changes simply click on Next button to see the step5.
Click on Next button without any changes:

Click on Finish button, so that EO will be created, here our EO name is “InsertRecordsEO”.
Now after creating EO we need to attach this EO to VO.
Create a new VO, and in step2 select the EO under the package, actually in step2 it prompts us to select EO. The same scenario is shown in the below figure:

Click on Next button to see the step3 and in step3 now we can see all the available attributes of EO.
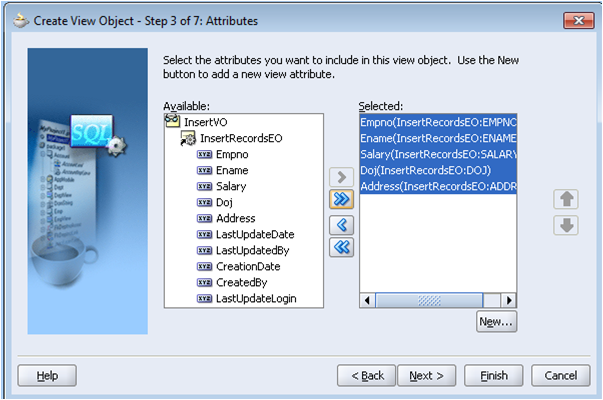
In step3 we need to select all the attributes which we want to include, after that click on next button and in step5 we can see the Query generated, if we want any changes to made in that query then click on Expert Mode which is unchecked, whenever we click on Expert Mode then the Generated Statement will be highlighted so that we can modify the query if required:

Click on Next button and finish the VO creation, and now the EO is attached to VO.
After creating VO and attaching EO to VO now we need to attache this VO to AM for that edit the AM as shown in the below figure:
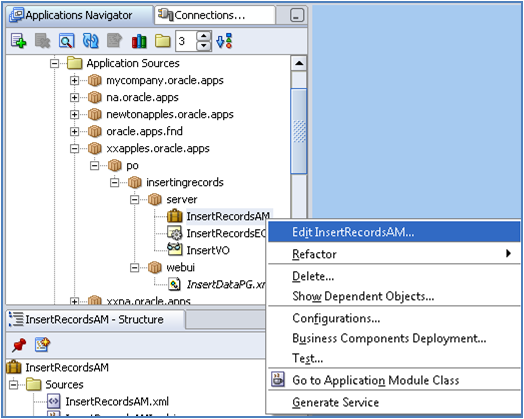
After editing AM extract the proper package name of our project in that we can see the VO select that VO and then click on > (Greater than symbol) arrow so that VO will be attached to AM, click on Apply button and then OK button.
Select the page attach AM to the page and give Window Title and Title in the Property Inspector.
Under the Main region create One Message Component layout region create five Message Text Input Items and one Submit Button, and one more reset Button.
Give Prompt names to all the items which are created accordingly, like :
Give Prompt names to all the items which are created accordingly, like :
item1 (Message Text Input item)
item2 (Message Text Input item)
item3 (Message Text Input item)
item4 (Message Text Input item)
item5 (Message Text Input item)
item6 ( Submit Button)
item7 (Reset Button)
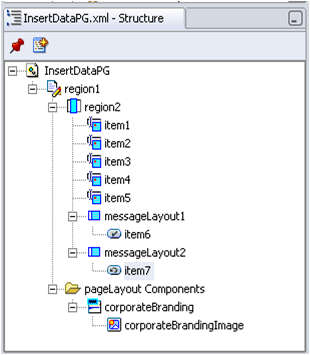
After creating items now the page structure looks like the following:
After creating items now the page structure looks like the following:
Select each Item and then for each Message Text Input Items select View Instance and View Attribute. The following pictures shows the selection process for one item.
Note that Data Type and Maximum length must be mapped properly to each item.
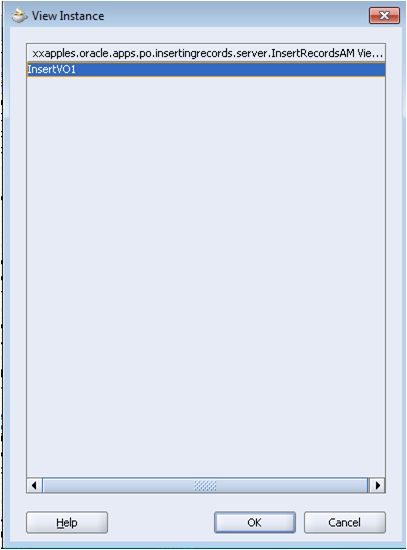
Selecting View Instance for an item click on view instance then click on the icon  so that the following window will get opens and then in that select the View Instance.
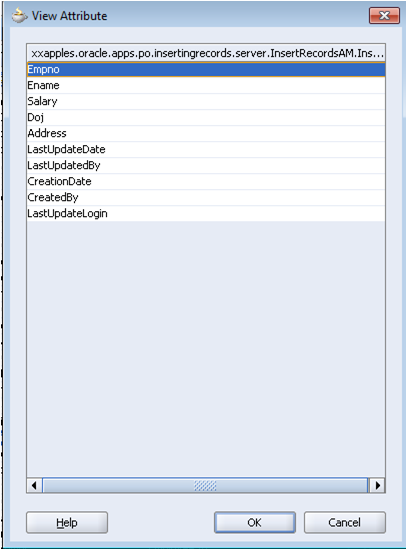
After selecting View Instance select View Attribute and then click on the icon so that one window will get opens and in that select the proper attribute.
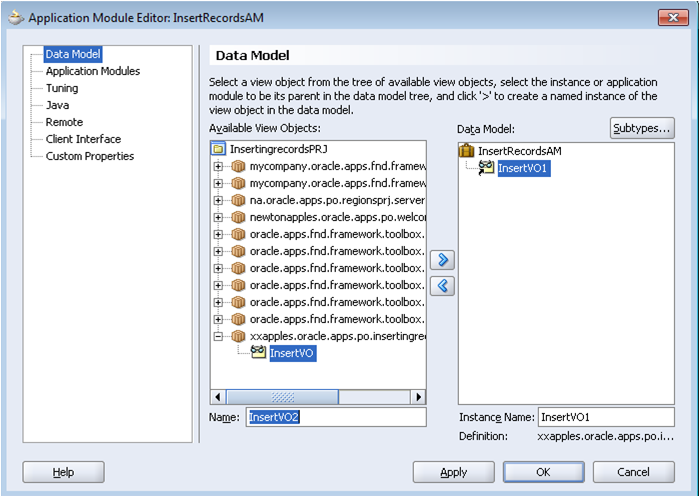
Now select the AM java program, the scenario is shown in the below picture:
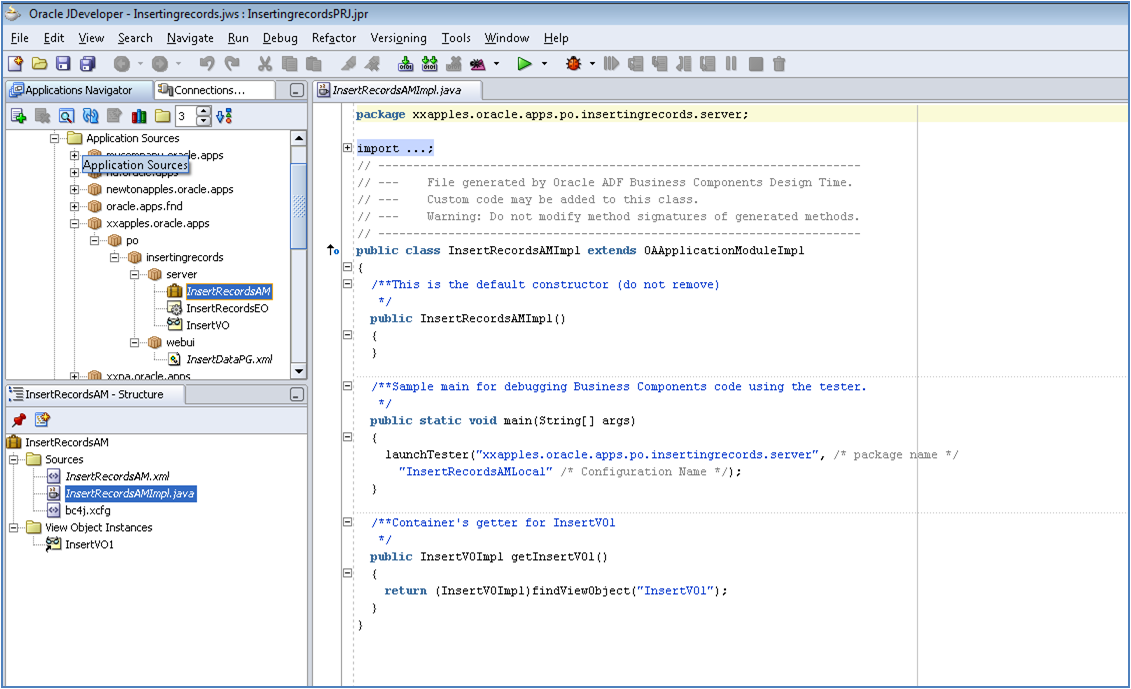
Now create one new method in the AMImpl class, here the method name is “InsertRecord”, write the following code in the AMImpl class :
Now select the AM java program, the scenario is shown in the below picture:
Now create one new method in the AMImpl class, here the method name is “InsertRecord”, write the following code in the AMImpl class :
[sql]public void InsertRecord()
{
InsertVOImpl vo= getInsertVO1();
OADBTransaction trans= getOADBTransaction();
vo.executeQuery();
Row v_row;
v_row = (Row)vo.createRow();
vo.insertRow(v_row);
}[/sql]
In process request of Controller initialize the AM the following code shows the initialization process of AM in controller.
{
InsertVOImpl vo= getInsertVO1();
OADBTransaction trans= getOADBTransaction();
vo.executeQuery();
Row v_row;
v_row = (Row)vo.createRow();
vo.insertRow(v_row);
}[/sql]
In process request of Controller initialize the AM the following code shows the initialization process of AM in controller.
[sql]public void processRequest(OAPageContext pageContext, OAWebBean webBean)
{
super.processRequest(pageContext, webBean);
{
super.processRequest(pageContext, webBean);
InsertRecordsAMImpl am=(InsertRecordsAMImpl)pageContext.getApplicationModule(webBean);
am.InsertRecord(); /* Name of the method which we created in AM */
am.InsertRecord(); /* Name of the method which we created in AM */
}[/sql]
In the Process Form Request now we need to write the code for the item Save or Add prompt button so that whenever we click on that button the data will be added into the table.
In the Process Form Request now we need to write the code for the item Save or Add prompt button so that whenever we click on that button the data will be added into the table.
[sql]public void processFormRequest(OAPageContext pageContext, OAWebBean webBean)
{
super.processFormRequest(pageContext, webBean);
{
super.processFormRequest(pageContext, webBean);
InsertRecordsAMImpl am=(InsertRecordsAMImpl)pageContext.getApplicationModule(webBean);
if(pageContext.getParameter(“item6”)!=null)
{
am.getOADBTransaction().commit();
throw new OAException(“Employee Created sucsessfully”,OAException.CONFIRMATION);
}
{
am.getOADBTransaction().commit();
throw new OAException(“Employee Created sucsessfully”,OAException.CONFIRMATION);
}
}[/sql]
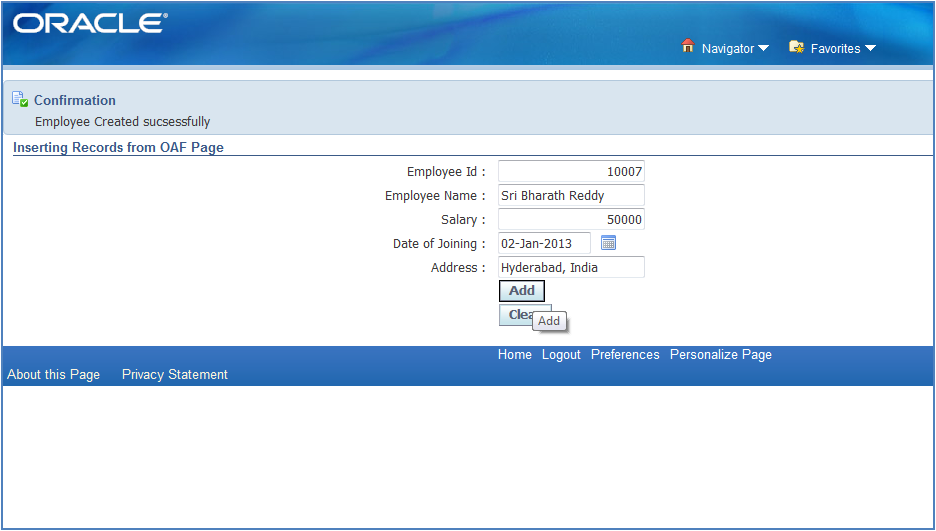
Now rebuild the code in AM and in Controller and run the page to see the output. Enter the data and click on Add button to save the entered data into the table.
Now rebuild the code in AM and in Controller and run the page to see the output. Enter the data and click on Add button to save the entered data into the table.
Run the SQL Query to see the output in DataBase.
[sql]SELECT * FROM xx_newton_employee;[/sql]

Ca
No comments:
Post a Comment