Search Pages
In this chapter we will see how to create search pages in OAF and how many different types of search pages are there in OAF.
We have three types of search pages in OAF
We have three types of search pages in OAF
- Automatic Search
- Result Base Search
- Manual Search
Automatic Search is again divided into two types:
- Inline LOV
- External LOV
Automatic Search and Result Base Search will take care by the Query Region where as for Manual Search we have to write the condition manually.
We will see in the coming chapters how to create the search pages in Oracle Apps Framework.
Automatic Search Inline LOV
In this lesson we will see how to create Inline LOV search page.
Inline LOV is used to search with in the page.
The following are the steps to create Inline LOV
The following are the steps to create Inline LOV
Step1: Create the new WorkSpace and project, create new page add AM to the page.
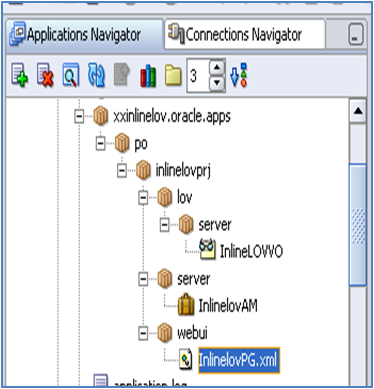
Step2: Create new VO in respective BC4J. While creating VO change the package name of BC4J to “.lov.server” at end, generally List of Values VO ends with LOVVO and the example BC4J path is:
Package (BC4J) : xxinlinelov.oracle.apps.po.inlineprj.lov.server
Package (BC4J) : xxinlinelov.oracle.apps.po.inlineprj.lov.server
VO name : InlineLOVVO
Query in the VO is:
[sql]SELECT first_name FROM PER_ALL_PEOPLE_F[/sql]
The Application Navigator of the project now looks like:
Step3: Under the main page create new item and select item style in property Inspector as “MessageLOVInput”.
[sql]SELECT first_name FROM PER_ALL_PEOPLE_F[/sql]
The Application Navigator of the project now looks like:
Step3: Under the main page create new item and select item style in property Inspector as “MessageLOVInput”.
We can find List of Values region under Message LOV Input item.
Right click on the List of Values region select New -> Table Using Wizard…
Here we can create Table Style region only we cannot change the region style to another one.
See the below image it shows that how the page structure will look now:
See the below image it shows that how the page structure will look now:
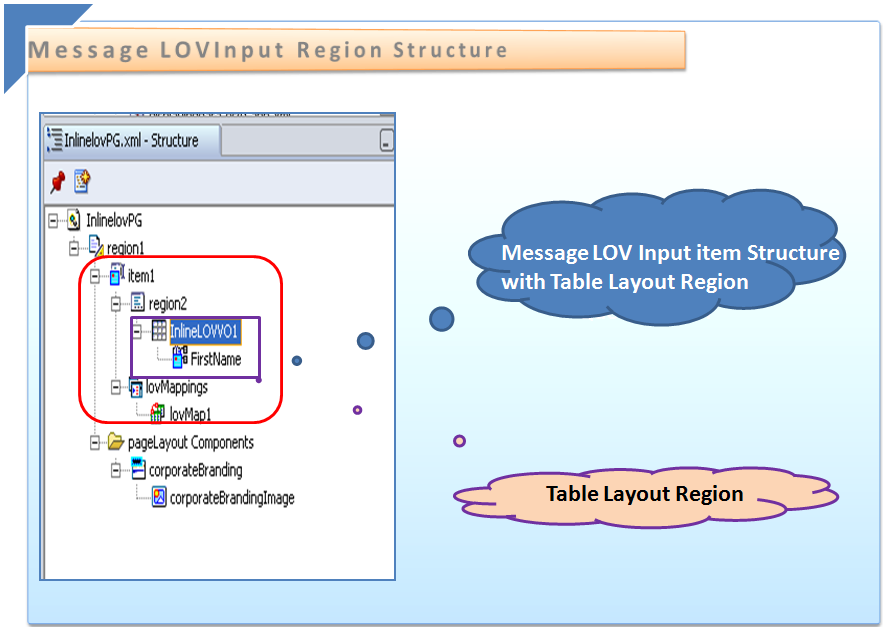
Select the FirstName item under the table region and then in the property Inspector of that item check that in the Functional, Search Allowed is set to True.
Step4: Select LOV Mappings in the structure of Message LOV input after that do the following changes in the property inspector of lovMap1.
Step4: Select LOV Mappings in the structure of Message LOV input after that do the following changes in the property inspector of lovMap1.
Functional:
LOV Region Item : FirstName (the item to display in the LOV region)
Return Item : item1 (the item to return)
Criteria Item : item1 (criteria item works like in where condition value)
Run the page and see the output. The first page of the output looks like the following:
Run the page and see the output. The first page of the output looks like the following:
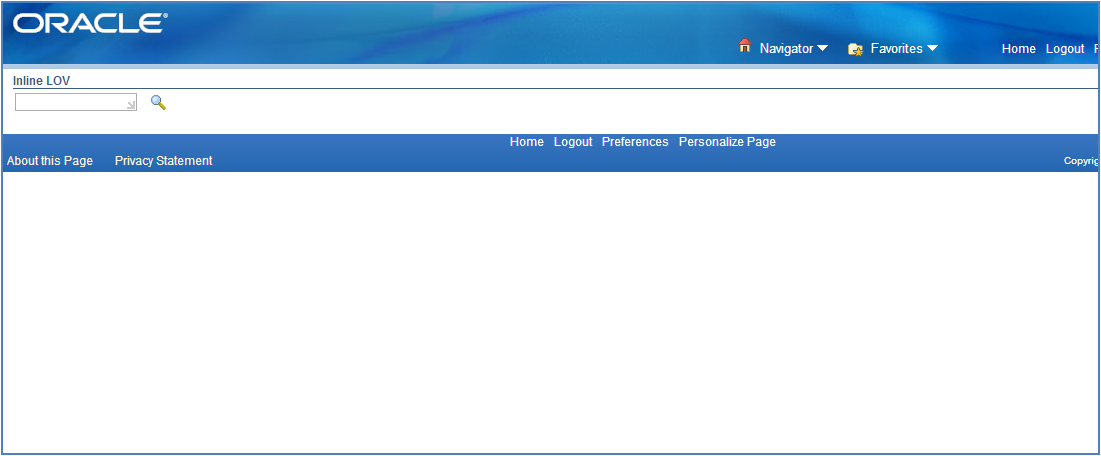
click on the search symbol
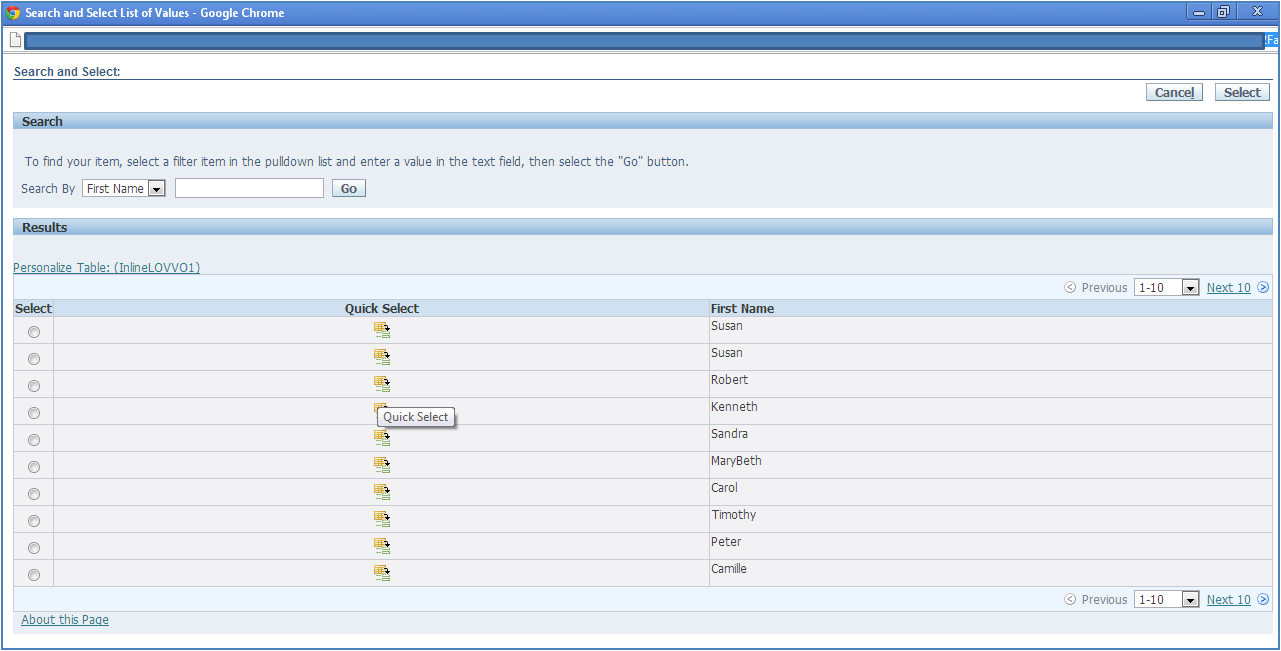
Check the Radio Button of which employee you want to choose and then click on Select button or use Quick Select option to select the name which is required.
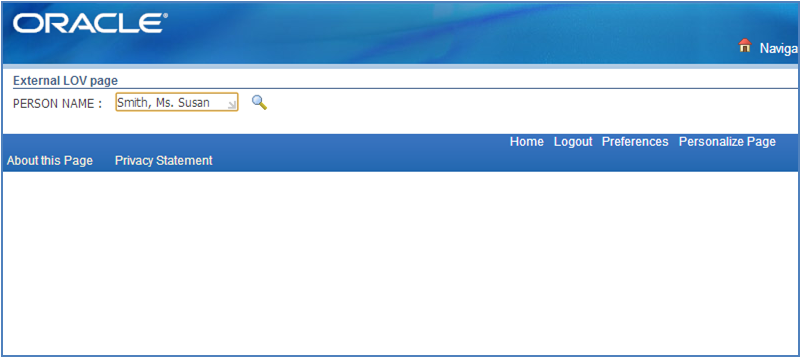
After choosing the name it will display in the Message Text Input item as follows:
After choosing the name it will display in the Message Text Input item as follows:
Automatic Search External LOV
In this lesson we are going to see how to Create Automatic Search using External LOV and the uses of external LOV in oaf. The difference between inline LOV and External LOV is inline lov is used only inside the page where as external LOV we can use for other pages inside the project.
So therefore the use or advantage of External LOV is if we want a list of values to be used for other pages in the project then we can create External LOV region and we can use the created region in any pages of the project.
Steps to create External LOV in oaf are follows:
Step1: Create Workspace, project , AM and create one page assign AM to the page give page title and window title.
Steps to create External LOV in oaf are follows:
Step1: Create Workspace, project , AM and create one page assign AM to the page give page title and window title.
For example :
workspace name : externlallov
Project Name : ExternallovPRJ
package name : externallov.oracle.apps.po.externallovprj.webui
AM name : ExternallovAM
AM Package name: externallov.oracle.apps.po.externallovprj.server
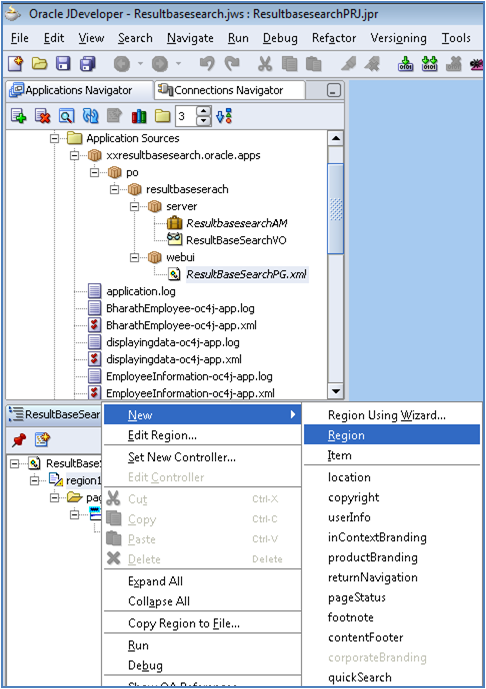
Step2: Right Click on the project select new as shown in the below picture.
Step2: Right Click on the project select new as shown in the below picture.
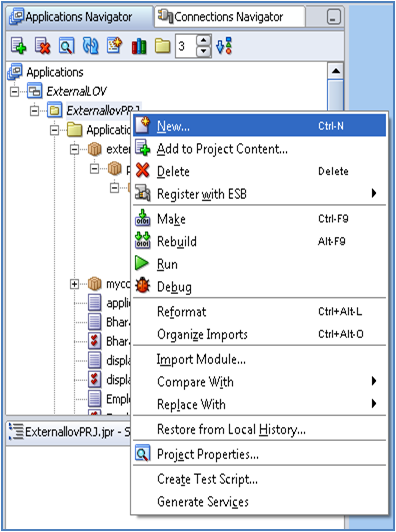
After selecting new option we will see a gallery window in that extract web tier in categories select OA Components and then select Region in items list.

After selecting region click on ok button so that a window will get open in that
Name : Give any user defined name
Package: Select the proper package of the project.
Style : select style as List of values.
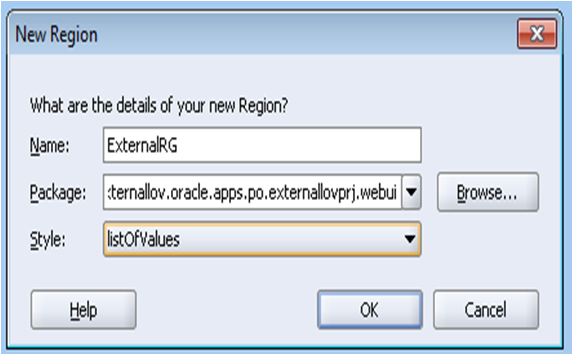
Now one .xml region will be created under webui.
Step3: Create on VO under the lov package for example select the package name as follows:
Step3: Create on VO under the lov package for example select the package name as follows:
externallov.oracle.apps.po.externallovprj.lov.server
VO Name is : externalLOVVO
Query in the lov is :-
[sql]SELECT FULL_NAME FROM PER_ALL_PEOPLE_F[/sql]
Step4: Attach VO to the AM.
Step4: Attach VO to the AM.
Step5: Under the region create one item and item style as Message LOV input. In previous lesson we already seen how the Message LOV input item structure look like.
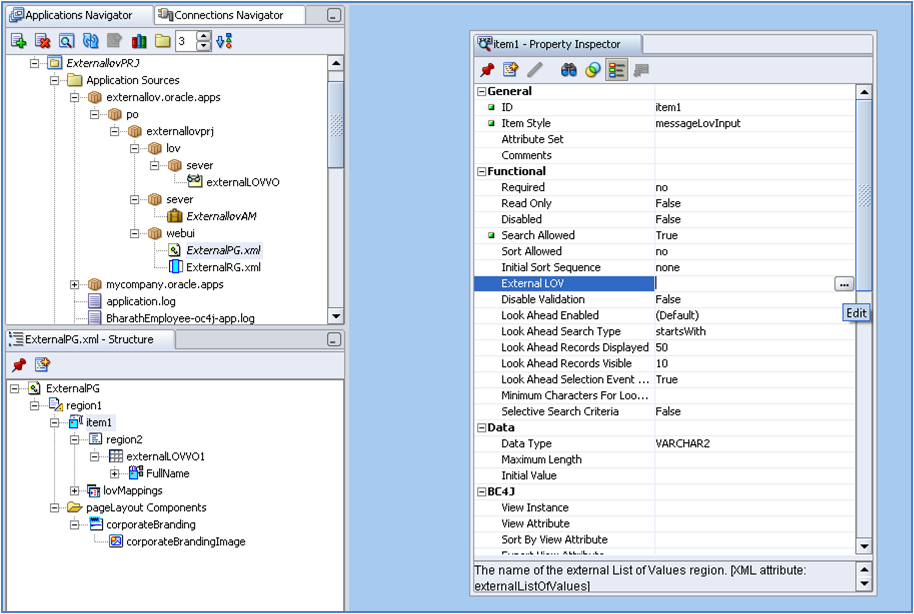
The below image shows how the Application Navigator and page structure of the project looks like:
The below image shows how the Application Navigator and page structure of the project looks like:

Step6: Under the Message LOV input region create on table region using wizard. In the table region select the proper package name and then as we attached our VO to the AM it will display our LOVVO so select that VO and therefore a table region will be created with one item under it.
Step7: Select the Message LOV input item and in the Property Inspector of Message LOV input select External LOV as shown in the below figure:
Click on the icon  so that the following window will get opens
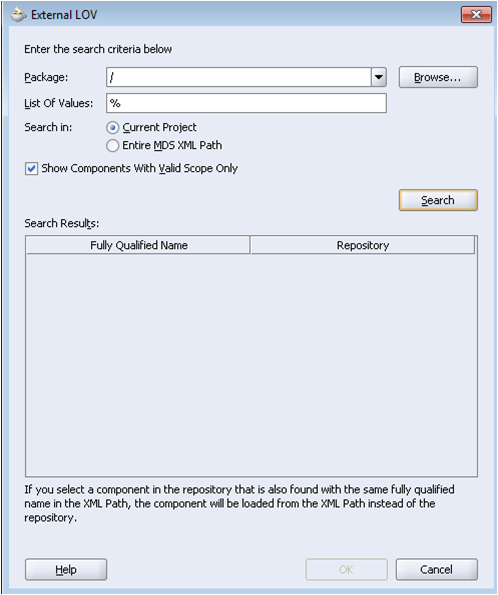
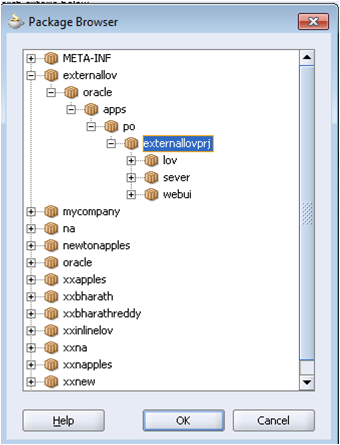
Click on the Browse button and then select the proper package name for example see the below picture:
Click on the search button and then select the fully qualified name in the search results for example see the below picture:
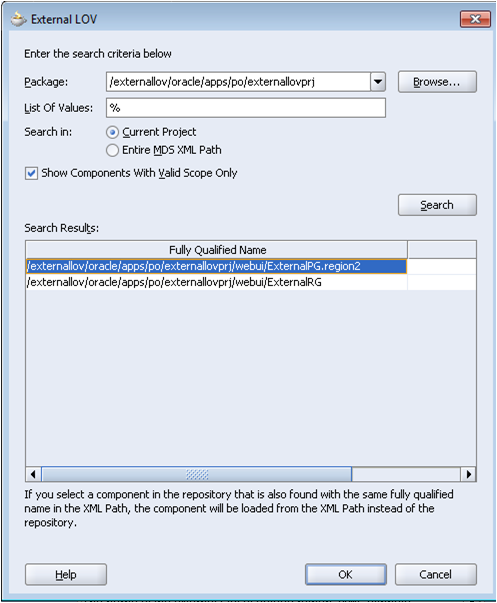
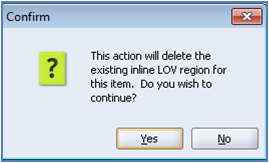
Click on OK button so that JDeveloper asks for confirmation in that click on OK button.
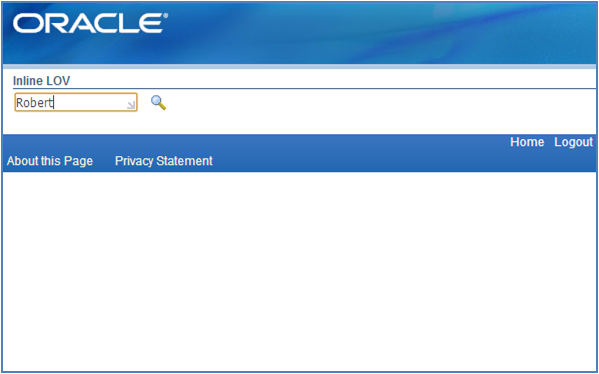
Step8: Run the page and see the output. The following three images shows the output and its work process
Step8: Run the page and see the output. The following three images shows the output and its work process

Click on the search image  so that it displays list of values as shown below.
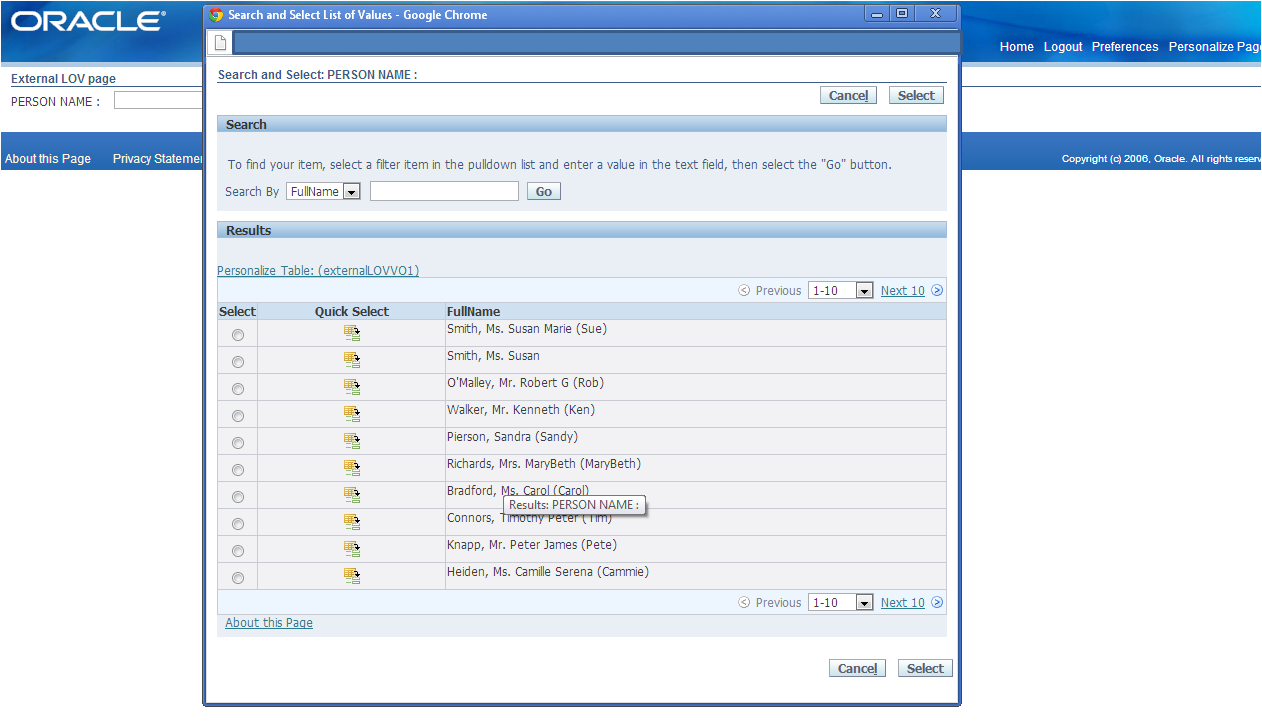
Select any value whichever you want to select. Use Quick select or radio button process:
Result Base Search
In this lesson we are going to see how to create Result Base Search.
Result base search will give the search results so the results whatever we are seeing in the page are just for display purpose we cannot select the resultant values like the way we select in Inline LOV or External LOV.
Steps to create result base search page in oaf:
Step1: Create Workspace, project , AM and create one page assign AM to the page give page title and window title.
For example :-
Steps to create result base search page in oaf:
Step1: Create Workspace, project , AM and create one page assign AM to the page give page title and window title.
For example :-
workspace name : ResultBaseSearch
project name : ResultbasesearchPRJ
package name : xxresultbasesearch.oracle.apps.po.resultbasesearchprj.webui
AM name : ResultbasesearchAM
AM Package name: xxresultbasesearch.oracle.apps.po.resultbasesearchprj.server
Step2: Create new VO in respective BC4J, generally List of Values ends with VO and the example BC4J path is:
Step2: Create new VO in respective BC4J, generally List of Values ends with VO and the example BC4J path is:
Package (BC4J) : xxresultbasesearch.oracle.apps.po.inlineprj.server
VO name : ResultBaseSearchVO
Query in the VO is:
[sql]SELECT PERSON_ID,
FULL_NAME,
DATE_OF_BIRTH,
KNOWN_AS,
NATIONALITY
FROM PER_ALL_PEOPLE_F[/sql]
Step3: Attach VO to the AM
[sql]SELECT PERSON_ID,
FULL_NAME,
DATE_OF_BIRTH,
KNOWN_AS,
NATIONALITY
FROM PER_ALL_PEOPLE_F[/sql]
Step3: Attach VO to the AM
Step4:- After creating VO and attaching it to AM, in this step create new region under main region and select the region style in property inspector as Query. It means we need to create a Query region under the main region.
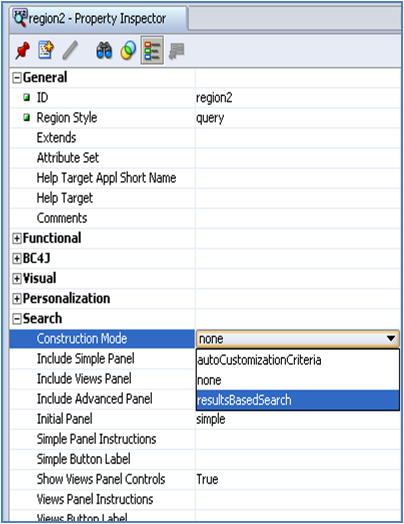
After creating Query Region in main region select the Query Region property Inspector and in Property Inspector select Construction Mode as Result Base search as shown in the below figure:
After creating Query Region in main region select the Query Region property Inspector and in Property Inspector select Construction Mode as Result Base search as shown in the below figure:
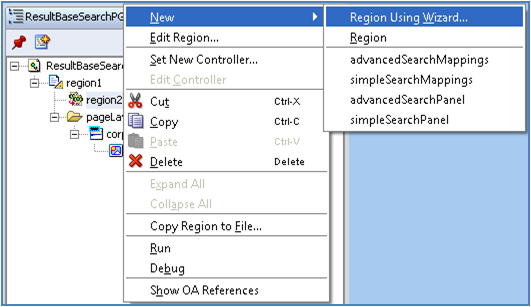
Now in the page structure select the Query region, right click on the Query region select New -> Region Using Wizard…
Select Proper Application Module in the first step of creating region as show in the below figure:

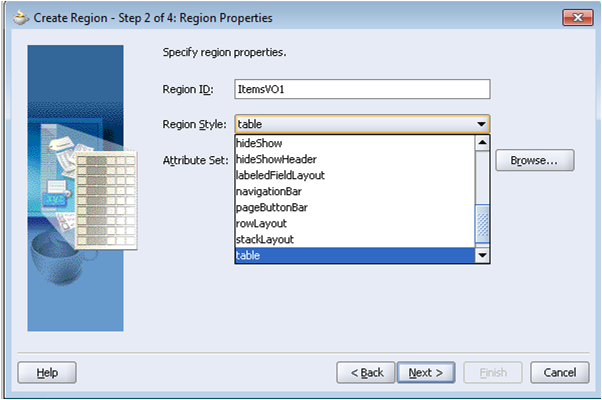
In step2 select the region style as Table as show in the below image:
In step3 select the attributes of VO which you want to display in the output.
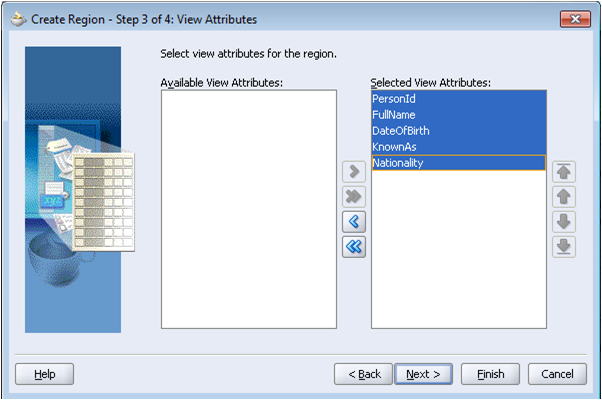
Finish the Region using wizard process.
Step5:- Run the page and see the output, if we observe in the output the Query region creates automatically Go and Clear buttons.
Step5:- Run the page and see the output, if we observe in the output the Query region creates automatically Go and Clear buttons.

Click on GO button to see the resultant output as shown in the below picture:
//Afzal: You can make search by fields also, just in the ResultBaseSearchVO1 table region, give any attribute(PersonId) property:Search Allowed True.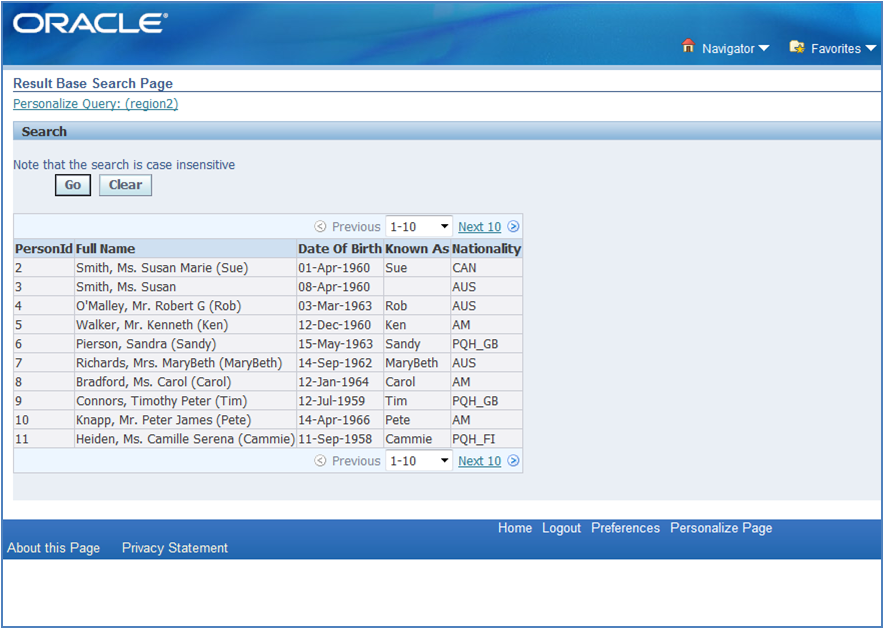
Manual Search
In this lesson we are going to see how to create manual search page in OAF manually. Manual Search page we need to enter the data value to search for example employee names starting with ‘A’ then we used to type A% in oracle apps forms similarly in OAF the manual search page will work like.
Step 1: Create Workspace, project , AM and create one page assign AM to the page give page title and window title.
For example :
Step 1: Create Workspace, project , AM and create one page assign AM to the page give page title and window title.
For example :
workspace name : ManualSearch
Project Name : ManualSearchPRJ
package name : xxmanualsearch.oracle.apps.po.manualsearchprj.webui
AM name : ManualSearchAM
AM Package name: xxmanualsearch.oracle.apps.po.manualsearchprj.server
Step 2:- Create VO and attach VO to AM
Step 2:- Create VO and attach VO to AM
VO Name is : ManualsearchVO
Query in the VO is :-
[sql]SELECT * FROM dept
WHERE deptno LIKE NVL(:1, deptno)
AND dname LIKE NVL (:2, dname)
AND loc LIKE NVL(:3, loc)[/sql]
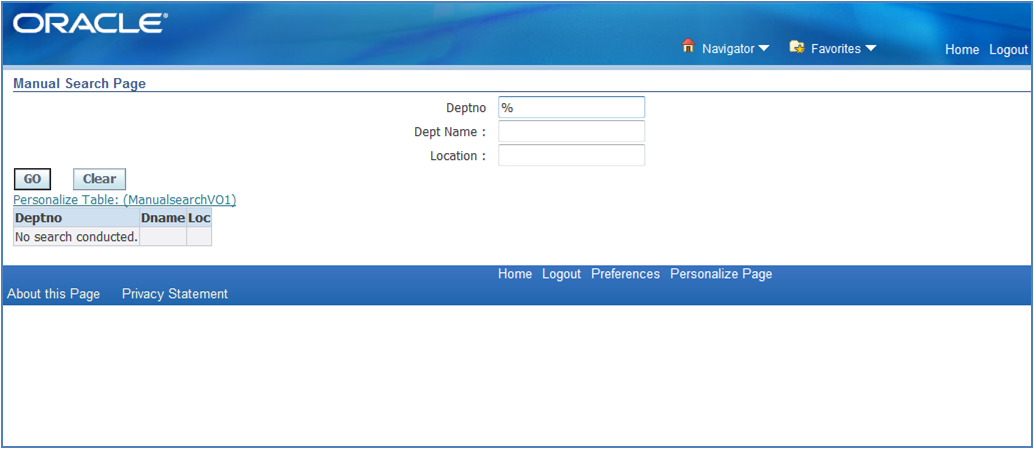
Step 3:- The below picture shows the requirement so there fore we need to create a page to achieve the requirement.
[sql]SELECT * FROM dept
WHERE deptno LIKE NVL(:1, deptno)
AND dname LIKE NVL (:2, dname)
AND loc LIKE NVL(:3, loc)[/sql]
Step 3:- The below picture shows the requirement so there fore we need to create a page to achieve the requirement.

Now if we observe the above image we need to create three Message Text Input items for search and two button items.
After entering data in Message Text Input items and once we click on Go button then according to the search item provided the resultant values must be displayed in the below table region.
Steps to construct the page like above picture:
Steps to construct the page like above picture:
step 1: Create one message component layout region
step 2: Under message component layout region create three message text input items.
step 3: Create one Row Layout Region under main region, under Row Layout Region create two Submit buttons and if we want a space between two buttons then create one Spacer item between two submit button items.
step 4: Create one region using wizard and select region style as Table, select proper package name in which we created VO (ManualsearchVO).
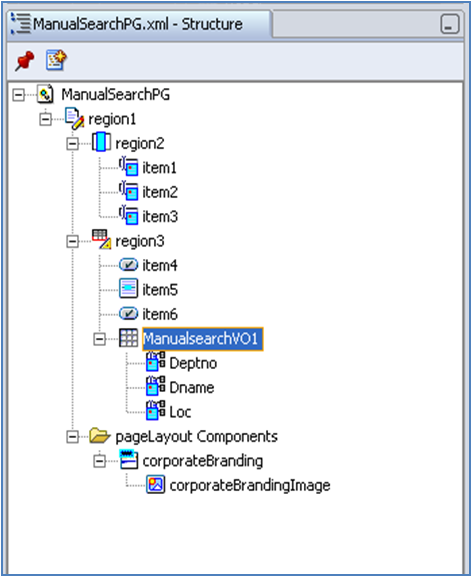
After creating all the page structure may look like :
Step 4:- Open the java file of AM and create one method in AM and write the logic.
After creating all the page structure may look like :
Step 4:- Open the java file of AM and create one method in AM and write the logic.
[sql]public void xxSearchParams (OAPageContext pc,OAWebBean wb)
{
String dno = null;
String dname = null;
String loc = null;
//ManualsearchVOImpl vo= getManualsearchVO1();
OAViewObject vo= getManualsearchVO1();
if(pc.getParameter(“item1”)!=null)
{
dno = pc.getParameter(“item1”).toString();
vo.setWhereClauseParam(0,dno);
}
else
{
vo.setWhereClauseParam(0,null);
}
if(pc.getParameter(“item2”)!=null)
{
dname =pc.getParameter(“item2”).toString();
vo.setWhereClauseParam(1,dname);
}
else
{
vo.setWhereClauseParam(1,null);
}
if(pc.getParameter(“item3”)!=null)
{
loc = pc.getParameter(“item3”).toString();
vo.setWhereClauseParam(2,loc);
}
else
{
vo.setWhereClauseParam(2,null);
}
vo.executeQuery();
}[/sql]
Step 5:- Create the controller and write the logic for buttons in Process Form Request of controller and here is the logic.
{
String dno = null;
String dname = null;
String loc = null;
//ManualsearchVOImpl vo= getManualsearchVO1();
OAViewObject vo= getManualsearchVO1();
if(pc.getParameter(“item1”)!=null)
{
dno = pc.getParameter(“item1”).toString();
vo.setWhereClauseParam(0,dno);
}
else
{
vo.setWhereClauseParam(0,null);
}
if(pc.getParameter(“item2”)!=null)
{
dname =pc.getParameter(“item2”).toString();
vo.setWhereClauseParam(1,dname);
}
else
{
vo.setWhereClauseParam(1,null);
}
if(pc.getParameter(“item3”)!=null)
{
loc = pc.getParameter(“item3”).toString();
vo.setWhereClauseParam(2,loc);
}
else
{
vo.setWhereClauseParam(2,null);
}
vo.executeQuery();
}[/sql]
Step 5:- Create the controller and write the logic for buttons in Process Form Request of controller and here is the logic.
[sql]public void processFormRequest(OAPageContext pageContext, OAWebBean webBean)
{
super.processFormRequest(pageContext, webBean);
{
super.processFormRequest(pageContext, webBean);
ManualsearchAMImpl am=(ManualsearchAMImpl)pageContext.getApplicationModule(webBean);
if(pageContext.getParameter(“item4”)!=null)
{
am.xxSearchParams(pageContext,webBean);
}
if(pageContext.getParameter(“item6”)!=null)
{
OAMessageTextInputBean msb = (OAMessageTextInputBean)webBean.findChildRecursive(“item1”);
msb.setValue(pageContext,null);
OAMessageTextInputBean msb2 = (OAMessageTextInputBean)webBean.findChildRecursive(“item2”);
msb2.setValue(pageContext,null);
OAMessageTextInputBean msb3 = (OAMessageTextInputBean)webBean.findChildRecursive(“item3”);
msb3.setValue(pageContext,null);
}
}[/sql]
Step 6:- After writing logic in AM and Controller rebuild the code and run the page to see the output.
The resultant page may look like the following figure:
if(pageContext.getParameter(“item4”)!=null)
{
am.xxSearchParams(pageContext,webBean);
}
if(pageContext.getParameter(“item6”)!=null)
{
OAMessageTextInputBean msb = (OAMessageTextInputBean)webBean.findChildRecursive(“item1”);
msb.setValue(pageContext,null);
OAMessageTextInputBean msb2 = (OAMessageTextInputBean)webBean.findChildRecursive(“item2”);
msb2.setValue(pageContext,null);
OAMessageTextInputBean msb3 = (OAMessageTextInputBean)webBean.findChildRecursive(“item3”);
msb3.setValue(pageContext,null);
}
}[/sql]
Step 6:- After writing logic in AM and Controller rebuild the code and run the page to see the output.
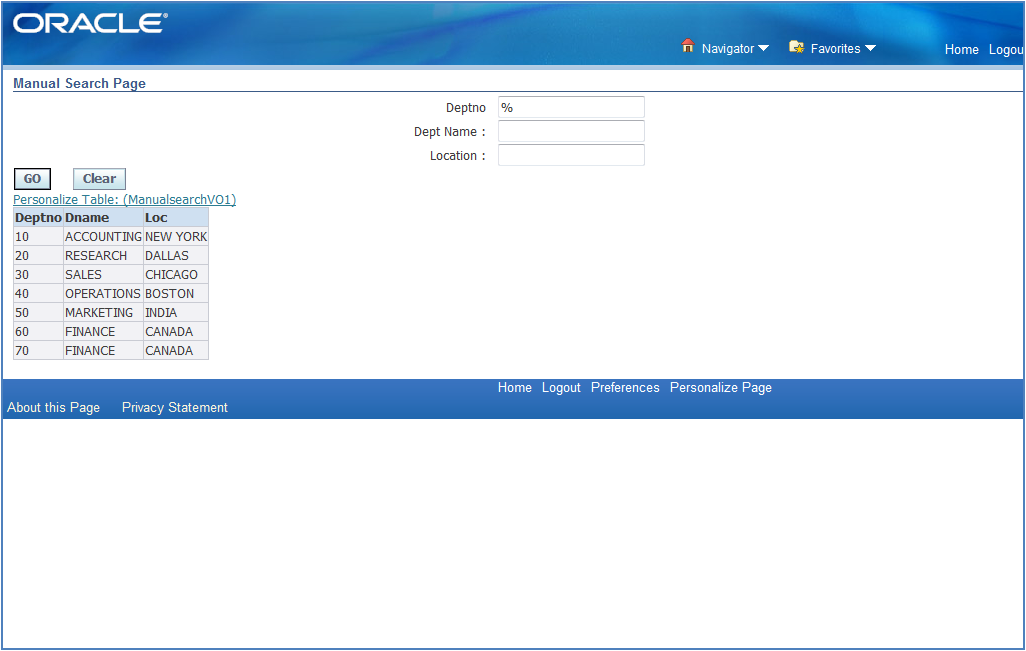
The resultant page may look like the following figure:
Give some text in any Text input field and click on go button.
Reference: newtonapples.com
No comments:
Post a Comment