CO Extension in OAF
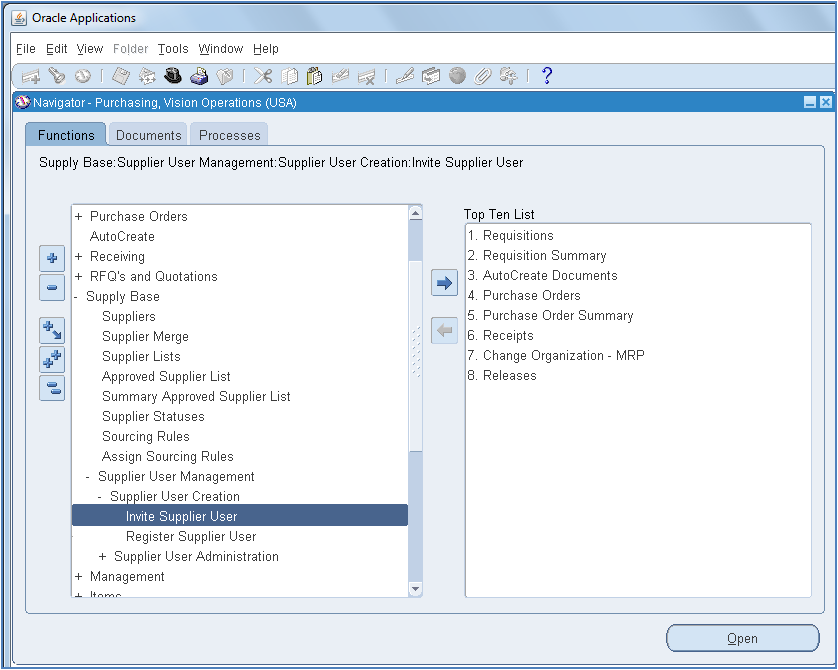
In this lesson we are going to see how to extend CO (Controller) in OAF. Before that let us see the requirement. Go to the following navigation.
Purchasing, Vision Operations -> Supply Base ->Supplier User Management ->Supplier User Creation ->Invite Supplier User.
For reference let’s have a look into the below image:-
For reference let’s have a look into the below image:-
After selecting the Invite Supplier User we will see OAF page. The same page part is shown in the below image.
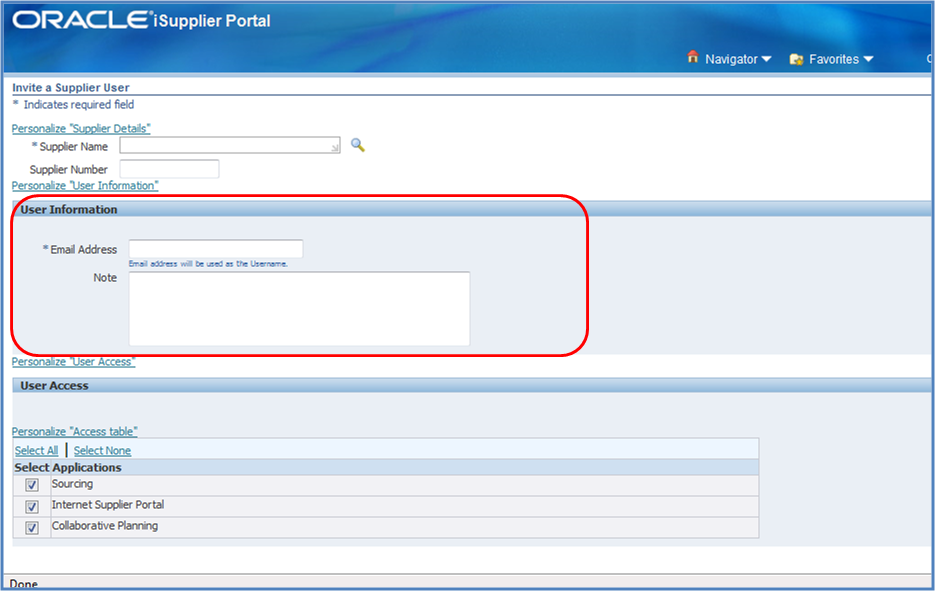
If you observe in the above image User Information is highlighted which contains Email Address and Note. Here our requirement to add User Name field into the User Information. It means if we logged in with Operations user then that User Name must display in User Information.
If you observe, according to the requirement, we need to display the User Name when the page is loaded. It means we need to write the code in the processRequest of Controller class.
Let us see the CO extension process step wise:-
Let us see the CO extension process step wise:-
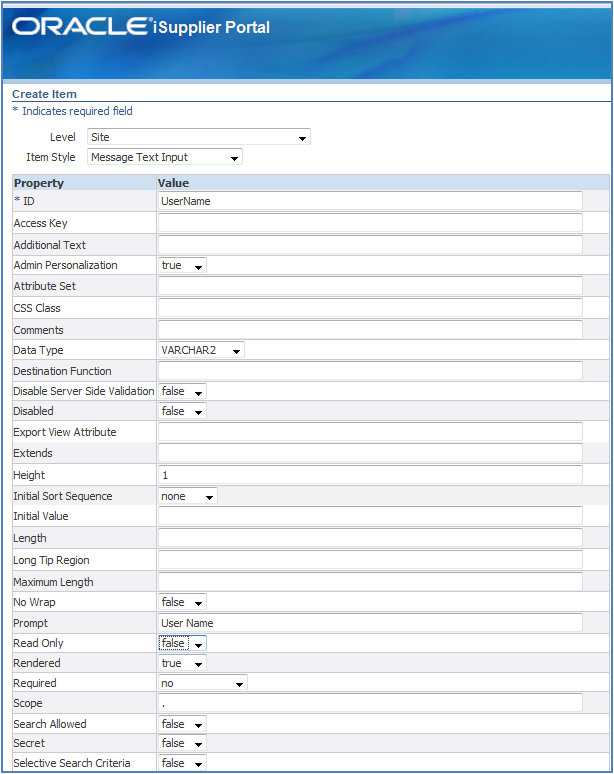
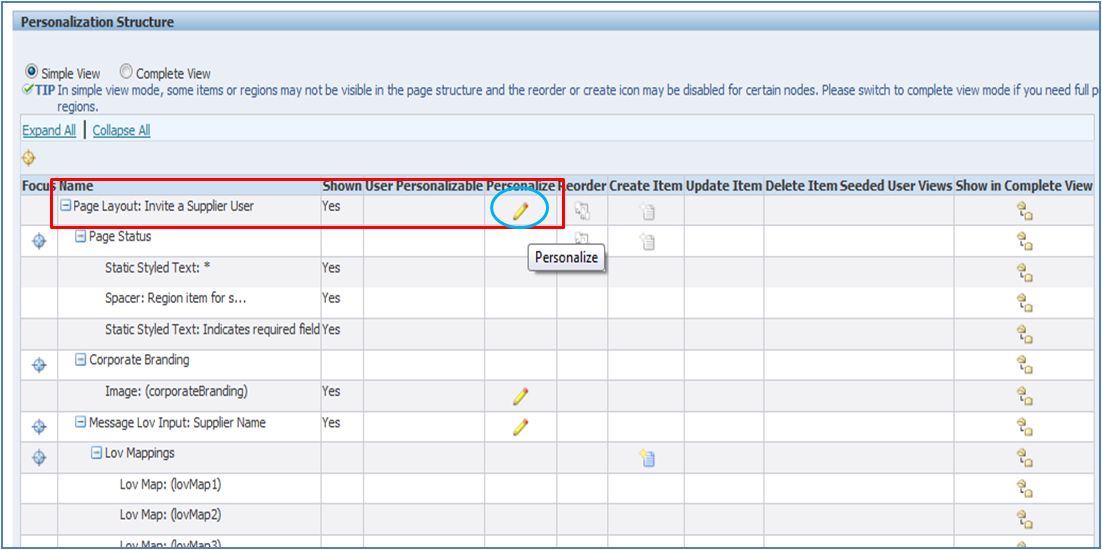
Step 1: First to display the user name we need to create one item, so therefore create one item for that Select Personalize “User Information” in OAF page.
After that select create Item image as shown in the below image:

For item in the properties:-
Level : Site
Item Style : Message Text Input
ID : UserName
Prompt : User Name
Step 2: Finding the Controller to extend. Before extending CO we need to find out which Controller we need to extend. This step explains how to find the main CO in page.
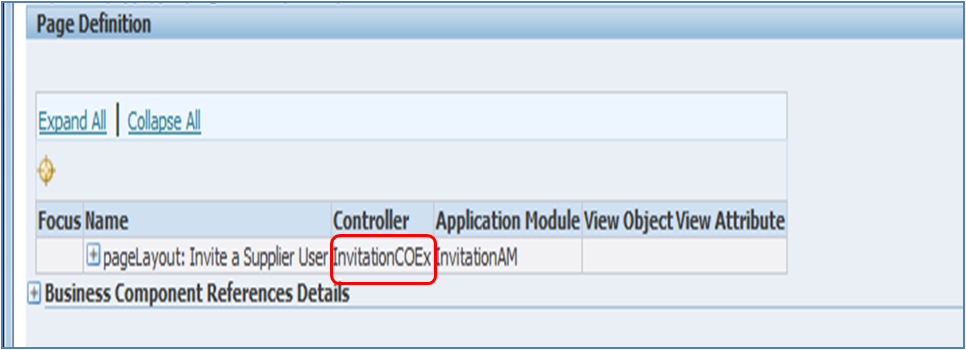
Go to “About This Page”, Expand all. After expanding all we can see the controller name in Controller column in the same row where the page name contains.
For example in our requirement the page name is Invite a Supplier User, so in that row InvitationCO is added. It means Invitation CO is the main Controller.
For example in our requirement the page name is Invite a Supplier User, so in that row InvitationCO is added. It means Invitation CO is the main Controller.
The below image shows two controllers, but if you observe InvitationCO is the main Controller because which is attached to the main page region.
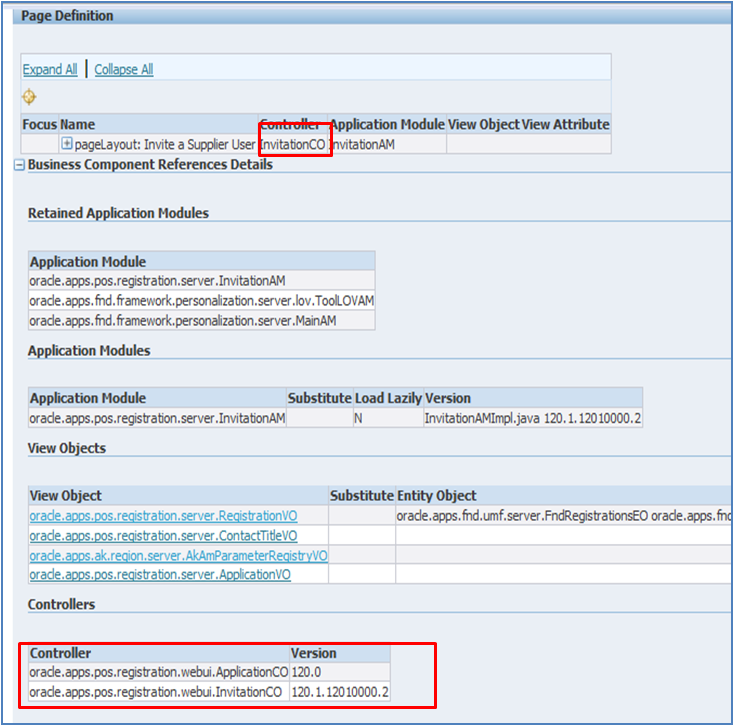
So therefore finally we came to know that InvitationCO is the Controller which we need to extend.
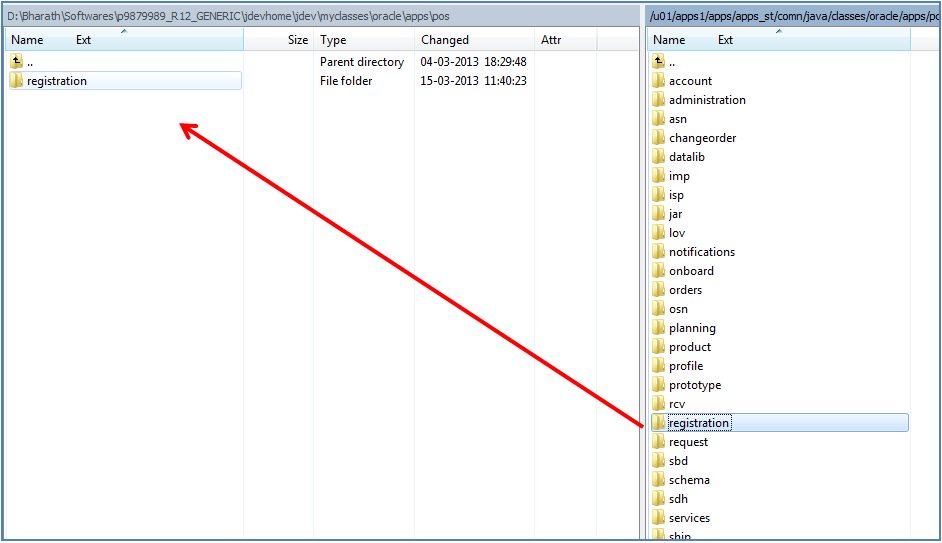
Step 3: Download the Controller from the $Java_Top and create the directory structure in JDeveloper Patch file in our desktop system.
Step 3: Download the Controller from the $Java_Top and create the directory structure in JDeveloper Patch file in our desktop system.
Note that it is not necessary that we need to download entire files in the structure. Copying the whole files in the structure may take long time for copying and also most of the times it impact on JDeveloper performance.
The below sample image shows the copying and creating directory structure process, which shows actually what exact files are copying from the server.
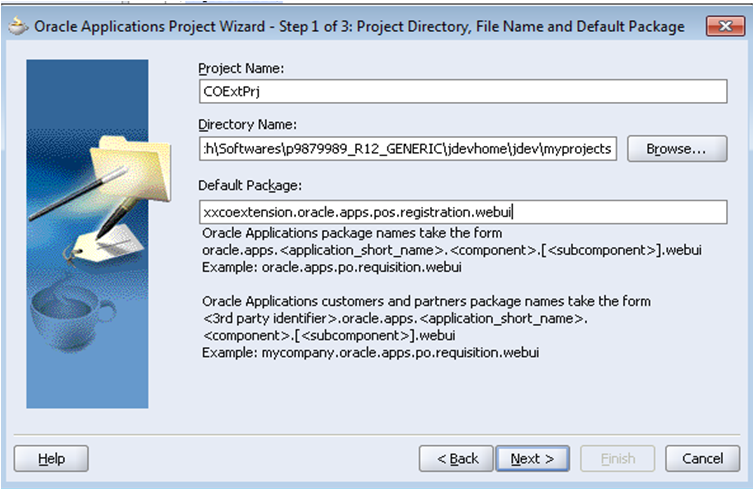
Step 4: Open the JDeveloper and Create the Dummy work space.
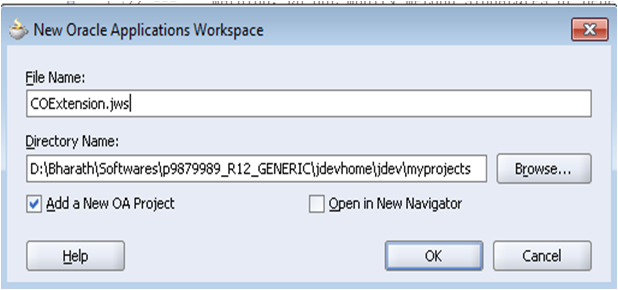
Note that while in Project Wizard you must give the same package name which you will find in about this page. For example see the below image.
After finishing project, create the dummy page for structure.
Step 5: In this step you need to create one new controller. Normally we will create controller on page, just by right clicking on the page region we will select Set New Controller… option, but here in Controller extension it is not like that. Let’s see how to set controller in CO Extension.
Step 5: In this step you need to create one new controller. Normally we will create controller on page, just by right clicking on the page region we will select Set New Controller… option, but here in Controller extension it is not like that. Let’s see how to set controller in CO Extension.
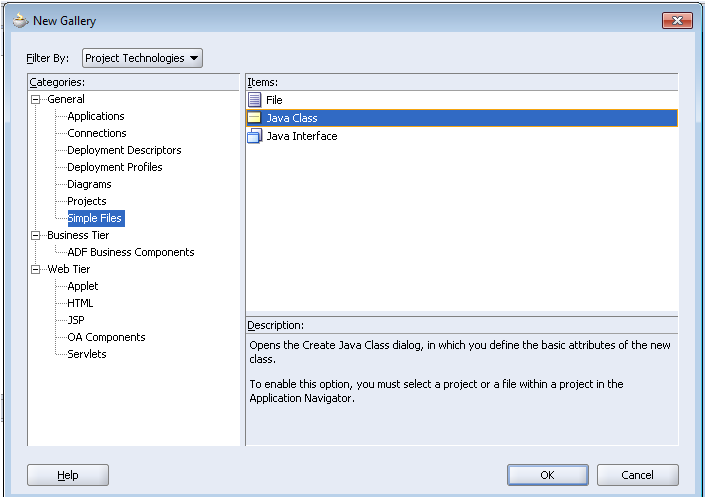
In Application Navigator, Right click on webui and select “New…” Option.
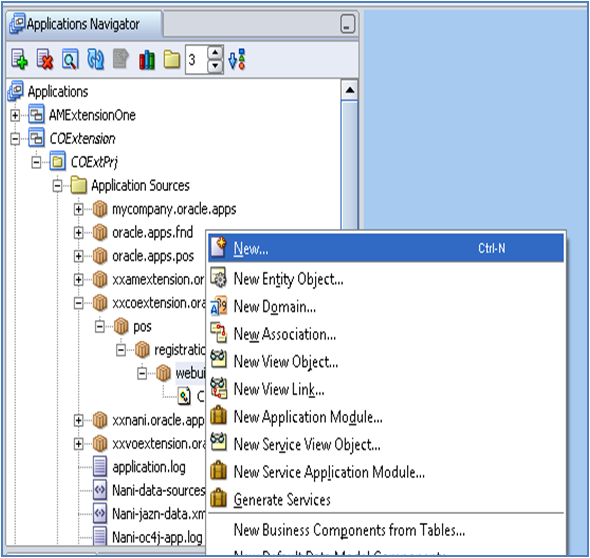
In Categories extract General and then select Simple Files. Select JavaClass in Items. The below image shows the Java Class Selection process.
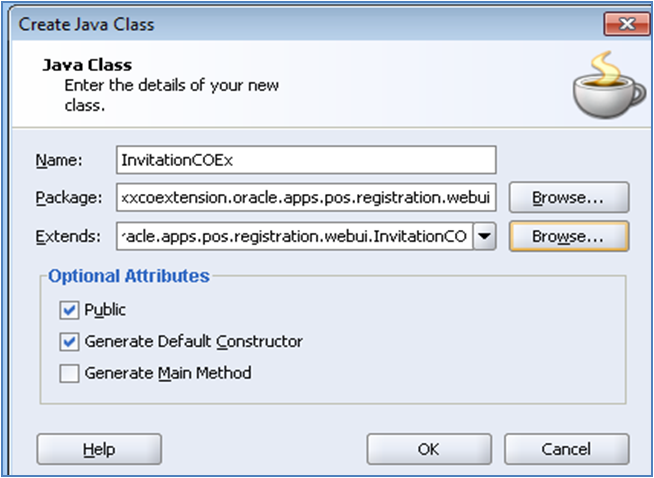
In Extends click on the Browse button and select Original CO (InvitationCO). This Original CO will be available because we copied the CO and created the same directory structure in JDeveloper patch.
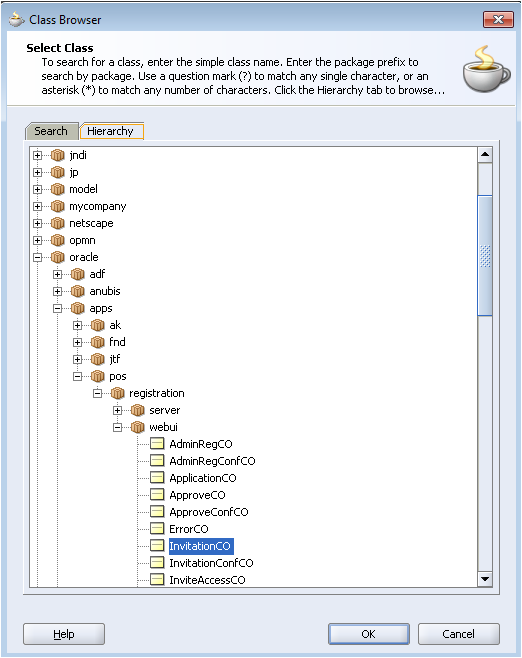
So therefore finally after giving Name, Package, and Extends click on OK button.
Step 6: In this step go to the controller java file, create the processRequest method same as it is in seeded. After creating method write the java code to display the User Name. The below is the java code that you need to type. Note that copying the below code and pasting it in your JDeveloper is fine, but check the import files properly.
[sql]package xxcoextension.oracle.apps.pos.registration.webui;
import oracle.apps.fnd.framework.webui.OAPageContext;
import oracle.apps.fnd.framework.webui.beans.OAWebBean;
import oracle.apps.fnd.framework.webui.beans.message.OAMessageTextInputBean;
import oracle.apps.pos.registration.webui.InvitationCO;
public class InvitationCOEx extends InvitationCO
{
public InvitationCOEx()
{
}
public void processRequest(OAPageContext pageContext, OAWebBean webBean)
{
super.processRequest(pageContext, webBean);
String UName = pageContext.getUserName();
OAMessageTextInputBean mst =(OAMessageTextInputBean)webBean.findChildRecursive(“UserName”);
mst.setValue(pageContext,UName);
}
}
[/sql]
Step 7: Copy the project folder and paste it in $Java_Top, Classes directory (folder) of server. The below image shows the sample process of moving the files from the desktop to the server.

Step 8: Login to the Application and click on “About This Page”, now we can see the Extended CO name which is replaced with the Earlier Seeded Name.
Here Like VO and AM extension no need to run the Import script. But to activate the CO you must follow the below step wise process.
First step, select Personalize Page option and then select Personalize button, for example see the below image.
In step two, at site level give the package name. Here you must be careful while creating package name. See the directory structure where actually the class file contains.
For example our class file is located in the following directory structure.
For example our class file is located in the following directory structure.
xxcoextension/oracle/apps/pos/registration/webui/InvitationCOEx.class
Now replace the slash (/) with the dots and remove .class, for example see the below one:
xxcoextension.oracle.apps.pos.registration.webui.InvitationCOEx
Finally the controller path is ready and that we need to give in site level (site level is an example we are taking here, you can take any other level too if required to restrict).
The below image shows the example, where actually the controller class path is given.
The below image shows the example, where actually the controller class path is given.

Now finally you can see that after extending CO we are able to see the User Name, whenever the page got loaded. For example see the below image:

No comments:
Post a Comment